I somehow managed to injure myself in the middle of the night a couple nights back, so I'm moving a bit slowly.
It's like I strained my knee, pulled it, or twisted it. I can walk fine, but it hurts to bend, get up, or sit down.
ANYWHO....
Alright. Next part!
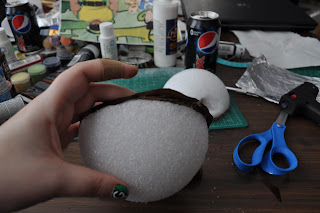
So I'm making this pattern on the fly, so I had to do things weirdly. To make a pattern to cut the fur from, I taped paper where I wanted there to be fur, making sure to fold it down as need be to get it as snugly to the head as possible.
Make sure to leave room for your hand.
After that, I cut it down the middle where I'd like the seam for the head. There's just no way to get it off in one piece and be able to cut it so that it will go around the head right. I have experience in plush animal sewing, so this is where my experience comes from. I also added darts to the paper as you can see so that I can glue the folds down to get the properly rounded effect. Either way, after cutting it off your foam head, flatten it down as much as possible. The darts kind of naturally form when you do that, you just have to refine them.
So what you want to do next is lay the pieces down on the non furry side of the fabric. You don't want anyone to see your lines. Trace the pieces and cut them out. Try to, when you're first laying them down on the fur, to make it so that the fur will look like it's going down on the face. Real fur tends to grow in one direction, kind of like a man's goatee, so you should try to make it look like the fur is growing down.
Pin the fur on the head with some sewing pins just to make sure it fits correctly. It's ok if it overlaps a little bit.
If it does overlap (mine did) take the half that overlaps off, but leave the other one pinned to the head.
Unpin the part you want to glue first (man do I love hot glue guns!) and lay the glue on the non furry side of the fabric and then press it back into place. I glued the part that touched the mouth first because I wanted to make sure it lined up properly. Pick a side on the darts to glue on top of the other and make sure to do the same on the other piece when you work on it. Whatever I was not actively gluing I left pinned in so that it would not shift.
When you are done gluing one half, pin the other one back on and glue it on in the same manner.
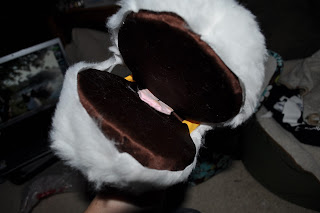
Next pin the brown felt along the top lip line in the approximate diameter that it shows on Momo's face. Cut off any excess width.
Then pin it as flat to the face as you can. Sorry, the middle of the face partial seam in inevitable due to the round nature of the face.
Then draw the approximate shape that appears on his face. (Yes, the shape is kind of like a butt.) Then take the felt off the face and cut along your line. Then fold the shape in half to even out the final shape. Then flip it over and pin it back on. Glue it in the same manner you glued the fur on the face.
Roll a ball of sculpey polymer clay (can get this at Walmart, Michaels, or any other craft store) for the eyes and divide it into half. Roll those two halves into balls...
Then squish it with a flat bottomed cup like the one at the top of this image.
Do the same with one small ball for the nose.
Bake in an oven (I use a toaster oven) at 275 degrees for 15 minutes. They should like the image above when they come out.
Then paint the nose black with acrylic paint and the eyes yellow. Add a daub of black in the middle of each eye for pupils.
To tell you the truth, I was at first tempted to use some eyes I already had on hand, but the pupils were too big.
So this is how the eyes and nose look when you hot glue them onto the face.
Until the ears are glued on, these eyes will stare into my husband's soul and haunt his dreams...
Next I worked on the tail.
I folded over the fur about an inch, pinned it, cut it. Try to get it as straight as possible
It is about a yard long.
Then pull about a yard long of metal wire. You can get it easily from Michael's for about $2.99 .
Straighten it out and pin it to the fabric. I accidentally pinned it into the carpet, but you know, it kept it flatter for me. Happy accident!
Then hot glue the wire to the fabric like you would a weld line. Make sure not to hot glue your pins in.
Now here's the tricky part. It took me an hour, be forewarned. Typically I would turn both furry sides together and sew a seam and turn it right side out. Not only is that a pain in the behind, but neigh impossible with a wire in there.
What I did here is turned the furry edges towards each other, poured a line of hot glue and pressed it together. after each section cooled, I lightly stuffed it with plush stuffing. Don't stuff it too much because it's going to counterbalance the puppet. You don't want it constantly falling backwards on the person.
Sorry about the Myspace photo (and the toilet with garbage in the background >_<) but that is how it's supposed to look when you're done. It's a good way to show just how long it is.
The wire was to make it pose-able, so it can coil like this and keep it's shape. I will write about how to keep it like that, but better, after I've done the body. This is all I have for now.
I also saw Gnomeo and Juliet today. I liked it a lot. Tons of Elton John references and Ozzy Osbourn as a lawn deer. XD
~Lumie


