Sunday, September 23, 2012

Appa tutorial part 3

The Hat

First, cut out the main piece as shown on the hat pattern I linked you to.

Second, sew it as shown in the pattern.

 It should look like this when you are done sewing that tiny seam.  I would also suggest if you use the very shedding fur like I did, to sew around the edges. Otherwise, it will NEVER stop shedding.

Next, draw an arrow. Remember how thick the one was from your tail?  You want to make the arrows on the body a consistent thickness.  Draw your arrow to be that width.

 See the thickness?
 Pin the brown down and sew it down with the fur facing up.  (Remember, clogging your sewing machine SUCKS!)


Next we work on Appa's face.  Remember the brim part of the pattern given?  Trace it so that it is one continual piece and then make a slight divot for the lips.  Then give it a 1 inch band on top of it so that you can have a place for eyes.  I did this on self adhesive stiff felt so that I could adhere the correct shades of grey on it and have firmness without much extra bulk.

 Cut out your pieces.

Adhere to the appropriate colors.

Cut out separate nose piece.  I used the shiny foot material I bought for the feet and used the other semi suede looking side for the eye band.

Pop holes in the stiff face band you had made in the spots where you had indicated in your drawing. (P.S. this is why I left the lids on the eyes.  If you don't, the eyes seem to stare into your soul. Creepy!)

Make sure to hot glue the nose onto the muzzle.

Hot glue the eyes in on the inner side of the face band.
 Hot glue the face band to the main hat part, then hot glue the muzzle to the face band.  Do not worry if you accidentally derp the eyes. You can reheat the glue and realign them.
 Draw appropriate sized horns on a piece of paper.
 Notice the size comparison.

 Cut out horns from your stiff felt and appropriate colored not stiff felt.
 Adhere horns to stiff felt.  Remember what side the non hot glue is because you will want to have that side facing forward.


Hot glue them to the eye band.

The hat requires 3 bands. The main one you want to reach from ear to ear and under the chin.  You want it loose enough to not irritate, and tight enough that it won't fall off.
Feel free to hot glue that elastic on.
then you want a piece that goes from behind the horns to under the ear on your dog.  Do it on both sides.  Again, hot glue is fine.  I folded the elastic over so that it could handle a bit of torque.


Saturday, September 22, 2012

Appa tutorial part 2

The "Donated Eyes" stare into your soul, and they are not happy...

So I am back.  I am sorry I took so long.

So out of the pattern pieces from the patterns mentioned in the last segment, you want these pieces plus the leg pieces. Cut two of the body pieces, 12 of the leg pieces, and 12 of the feet pieces.  Hold off on cutting the hat pieces for now.


Also, you are going to want to make a tail piece.  You are going to want it to be the width of the butt part of the body piece on the small end, and the width of the largest point of the body piece for the biggest end.  You want it to be just short of the length of the body piece when you are done.
When you cut out the fuzzy piece for the tail piece, put the non curved part on the fold so you have one continuous piece.  Do the same using the brown silky fabric for the underside of the tail.

I would make line stripes for the tail and belly shortly after cutting the pieces out.   I used brown fabric paint. This is the kind I typically use.

There are 2 potential methods for making lines on the tail.  One method is to use a straight edge and painting along the edge.  Otherwise, which is a better method, you can use the tape method.
Lay down parallel lines of tape for straight edge lines.  Make sure the groupings are equal distant apart.  Paint between the lines, wait for it to dry, and then peel the tape off.


To make the arrows on the tail, take the pattern piece that you used for a tail, cut a circle in the bulb area (I would suggest a bowl) and use a cookie sheet to make the lower arc.
Cut it in the same manner that you did the tail.

Lay the brown fur on the tail piece. Make sure the fur goes in the same direction.
 Pin the brown fur to the white fur.
 Flip it so fur side is up and sew the brown onto white fur.  You want the fur facing the air and not your sewing machine base because it is GOING TO CLOG IT!

This is how it should look once you have sewn it.

 Flip the fur to face the stripey side of the brown material and pin the edges together.
 If the edges stick out, you can trim them down, but it really does not matter because no one will see the excess.
Sew the pieces together, flip it right side out and you have a tail.

Tadaa you have a tail!  More to come.  I am sorry it is taking so long.


Wednesday, September 19, 2012

Appa Dog Costume Tutorial Part 1

To make an Appa costume for your dog I charge $50 plus the cost of materials and need specific measurements.  I do, however, know that I have people who have stumbled across this blog that may have a larger dog and are crafty themselves. :)

So, by popular demand, here is the free tutorial for an Appa Dog costume!

Materials needed:
  1. Hot glue
  2. A sewing machine (you can do it by hand, but it will not be as strong and it will take FOREVER!!!)
  3. Paper to print the patterns on.
  4. Stiff felt in 3 shades of grey if you can swing it and if you can't , get some stiff white felt and adhere the grey felt to it.
  5. Brown material, about a yard of it, to be used for the tops of feet and the underbelly.  I usually use micro suede because I get lucky in finding it in the bolt ends of my local Hancock Fabrics store and because it has a silky side and a fuzzy side. (that and I like shiney things)
  6. About 1 foot of grey material for the bottoms of the feet.  I used the same type of material as for the feet tops for consistency.
  7. Material for the white bits of Appa.  I use a type of fake fur, but if it too warm where you live, you might want to swap it for something less accurate and more comfortable for your dog.  For the human costume for a child in cold cold Minnesota I used a teddy bear type material.  For the dog costume for the dog in hot hot Texas, I used a silkier airier kind that actually is used on the Appa plushie sold in stores.  It sheds like the dickens, but is far more comfy for fluffy puppies. I bought 2 yards for a corgi sized dog.
  8. Brown fake fur.  I bought 1.5 yards for this.  It's not shear mass we are going for, but the ability to pick the right direction of fur in the length you want.  You will have leftovers.  If you are going the non fake fur route, you could probably get away with about 1 to 2 feet.
  9. Elastic to secure hat to doggie head and to make doggie mitten minders if you so desire.
  10. Buttons, I would suggest clear or white ones.
  11. A saccrificial stuffed animal.  I tried to find someone selling doll eyes, but the only place I could find them were at places like American Science and Surplus, Ax Man , and the internet all of which would take a while for me to aquire anything.  I am an impatient person, so I just went to the dollar store and found a plush with the right eyes.  The newly blinded toy was sewn back up with bells inside and became a Saber toy.


I tried for a while to come up with my own pattern, but lets just say I had issues.  So, I based the body on this pattern: http://www.saunalahti.fi/glottis/raincoat.htm and the footies on this pattern: http://domestikgoddess.com/sew-your-own-winter-dog-boots/ .  For the boots it says to put the tip of the boots on the fold.  Since I wanted Appa toes to peek out of them, I did not put that on the fold when I cut them out.  Also, the base pattern for the Appa hat is here: http://dogclothespatterns.blogspot.com/2012/01/dog-cap-pattern.html

I find that I am better at working with existing objects and modifying them.  Seems to work the same way for  patterns.  That is all for tonight.  Assembly and additional pattern pieces to come tomorrow.  If you went the fake fur route,  make sure that when you cut out the fur, that it all goes the same direction.  I would suggest making the fur point down towards the ground when worn.  Make sure to measure your dog and scale the pieces to their size when assembling the pattern pieces.  From the rain coat pattern, cut the side and leg pieces.  Don't bother with the belly piece unless you want it to close in the same fashion as the coat.

Recent Aquisition

Labor day I was at Bristol Ren. faire.  This was a recent acquisition.  If you had seen me recently, you would notice a pretty good waist reduction even for a quick and dirty self lacing.  Sorry about the Myspace type photo and the toothpaste on the mirror.

Monday, September 17, 2012

More costume pics

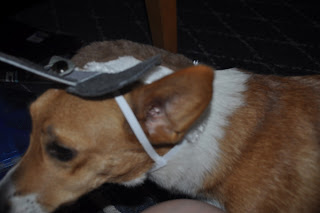
Saber does not like wearing costumes and tries to bite it off anytime I am in progress of putting one on.  About halfway through putting it on she gives up.
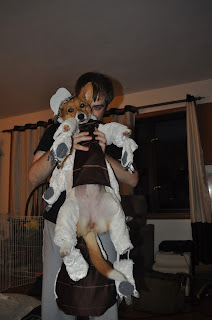
I made it so the feet were wearable or dangle able and the sleeves are optional.  If the dog does not like any sleeves other than the front ones, they don't have to stick their feet through them, hence the dangle able feet.


Saturday, September 15, 2012

Appa costume done

Better pictures to follow tomorrow!


Saber is not accustomed to costumery so she was fidgeting too much to get a good shot.  I made little footies that the dog can wear but also can be buttoned onto the sleeves if the dog is fidgety or also the costume could be worn kind of like a cape if necessary. 

Sorry it took so long.  My sewing machine broke part of the way through.  I sewed a part, changed the stitching pattern, the needle bent, put it back to the old position with a new needle, and now it only runs in reverse.  I am trying to figure out what the heck happened.

Thursday, September 6, 2012