So first of all, we are going to make those ears. Take two really big sheets of firm felt and trace your ear design. Judging by the screen caps I took, it should be two and a half heads long.

Cut both of them out.

I had to trim mine down because they were 3 inches too long.

Then I traced the ears onto my inner ear fabric. I was fortunate enough to have fabric that is orangy-brown on one side and chocolate brown on the other. Cut them out.

Then lay the pieces on top of each other and cut them into three pieces. I cut them evenly, but for you guys I would suggest making the bottom piece the biggest to accommodate for the later ear fuzz.
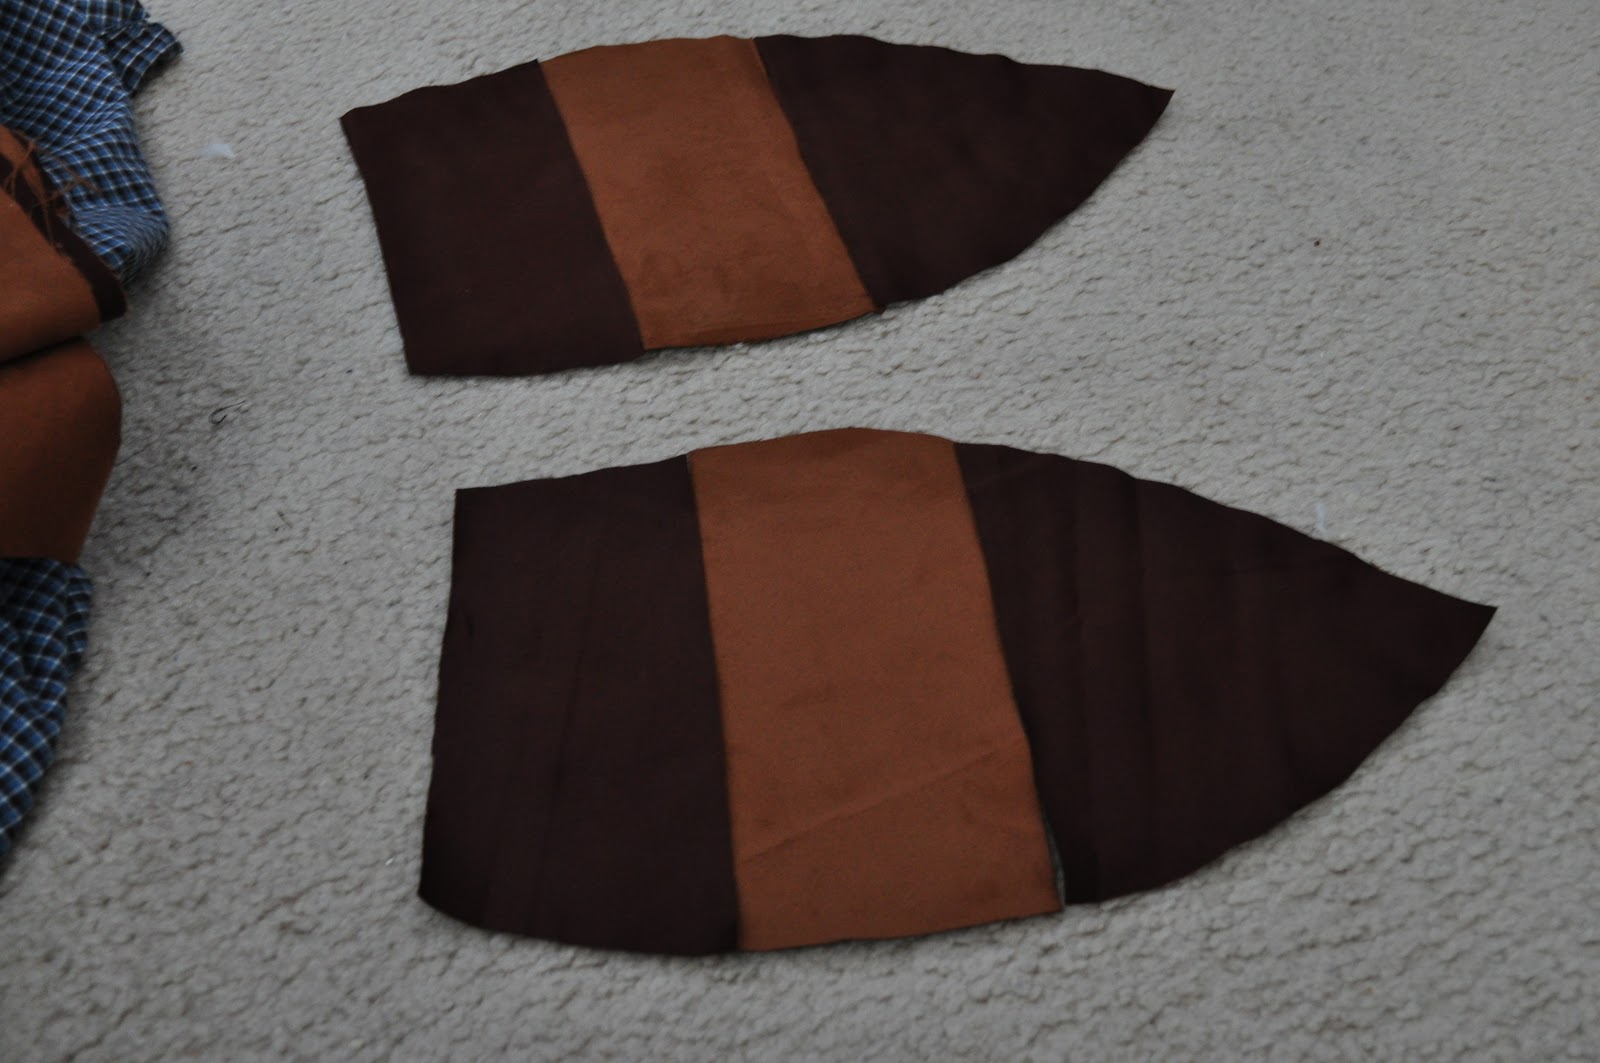
Then flip over the middle piece and swap them around so that they match up.

Align the pieces on the felt pieces to make sure you have it aligned right and then tape the front side of the pieces so that they won't shift on you.
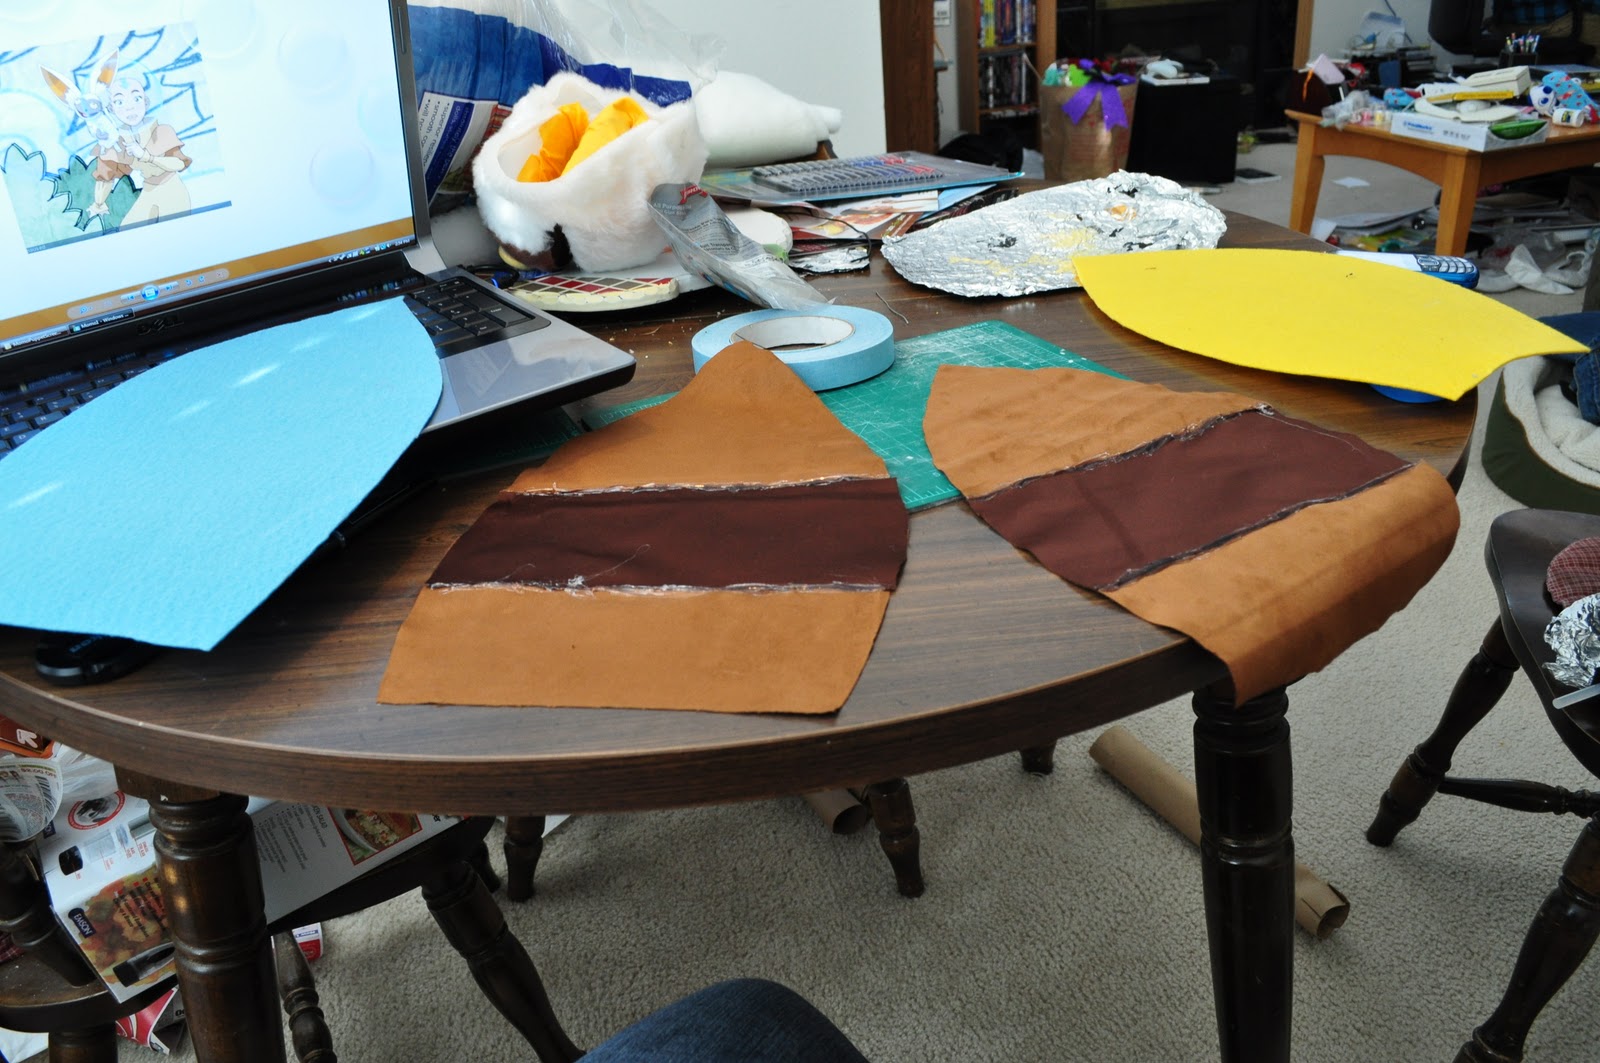
Put down a weld line of glue on the back side of the ear pieces so that they won't separate on you.

Wait for it to cool, then align the inner ear pieces on the felt piece. Pull back a part of the inner ear and add a little glue on the "weld lines" to get it to stay in place. Then pull back parts of the inner ear and add glue around the edge like above and lay it down. It doesn't matter if your fabric shows the glue lines around the edges, it's going to be covered anyways.

Trim any excess felt showing if there is any, and then repeat the last step on the other ear.

Lay your ears on the fur fabric and trace around it giving yourself 1 inch excess around the entire ear except the bottom.

Align the inner ear on the fur piece and peel up part of the inner ear to put a daub of glue between it and the fur piece so that it does not move. Then put two glue lines down for each piece you glue. Put one line on the edge of the inner ear and one on the edge of the fur. Fold over the fur over the edge like shown above. Remember, you can always enlarge these images by clicking on them.

This is how they should look when you're done.

Note the hairy glue gun.

Next we're going to work on the body. Notice that I haven't added on the ears yet.
To figure out the length of fabric, put your hand in the puppet's mouth and lay your forearm on the fabric. You want it to go to your elbow. Then pin the fabric around the opening to the head so that it goes around the puppet and overlaps slightly at the seam. Once you have your cut, turn int inside out and have the puppet head facing you. Pin it so that the furry parts are facing each other. To glue, lift a piece of the fabric, glue, press, remove next pin, lather rinse repeat. Make sure that the bottom part lines up as shown.

Just to show you the fur around the head and how to glue it.

Then glue the remaining edge like a seam. Then sew a straight line down the same edge. You want to reinforce this seam.

Turn the Momo puppet right side out.

Now we're going to work on the ears. Fold the bottom edge over itself as shown. glue the flap down.
Then on the entire flap that you just glue down add a pool of hot glue and then press to the back of the head.

Do the same for the other ear and then let them rest and set. I taped the back of the ears for this part so that they would not shift.

Once that has set, literally fill the basins the Momo ears have in the bottom with enough glue to cover all exposed fur.


Then take some of your scrap fur and make little crown pieces to glue into the inner ear. Make sure there are some points that they touch the inner ear material. Layer all the way to the bottom.
 Layer all the way to the bottom.
 Be careful about pressing anything into the ear with the hot glue or your hand will be like mine. Burned and in pain. I just finished icing my knee and ended up needing to perpetually ice my hand. *SIGH*
 I would also suggest stitching the ears to the neck.
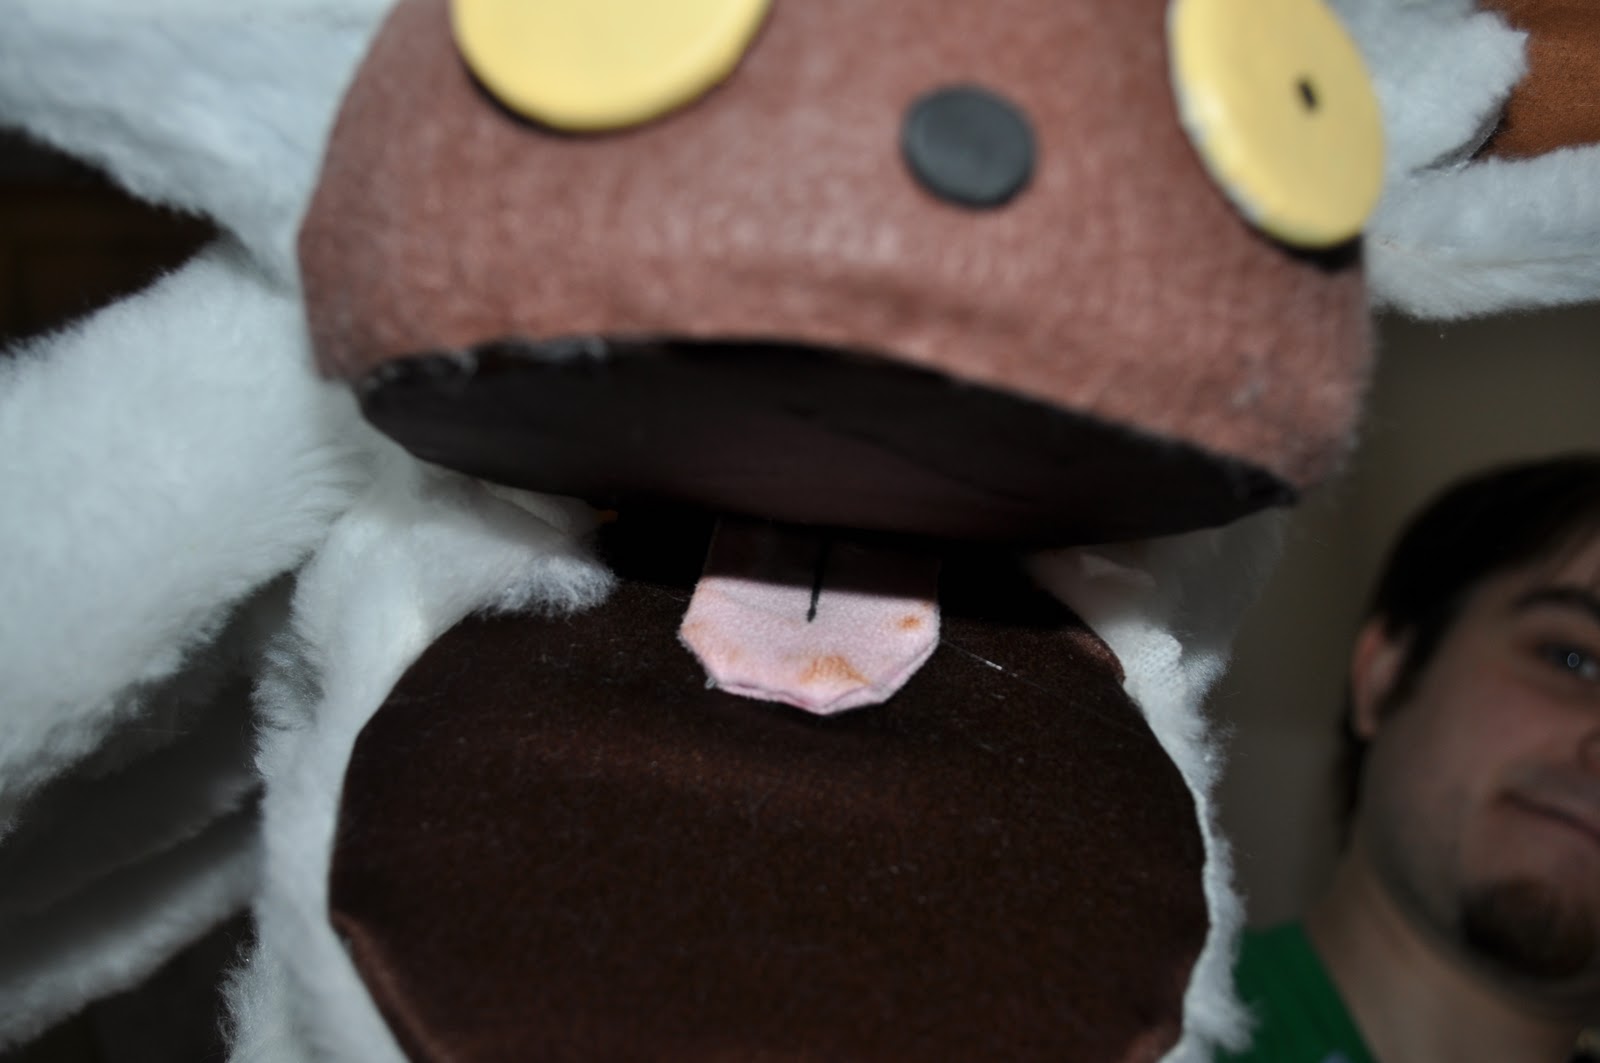
 Next, cut out the brown felt for the stomach. Judging by the screen shot, it's kind of lemon shaped. Then hot glue it to the puppet's stomach.

Then on the entire flap that you just glue down add a pool of hot glue and then press to the back of the head.

Do the same for the other ear and then let them rest and set. I taped the back of the ears for this part so that they would not shift.

Once that has set, literally fill the basins the Momo ears have in the bottom with enough glue to cover all exposed fur.

Then put in a little plush stuffing in that basin.

Then take some of your scrap fur and make little crown pieces to glue into the inner ear. Make sure there are some points that they touch the inner ear material. Layer all the way to the bottom.


Do this with all four limbs.


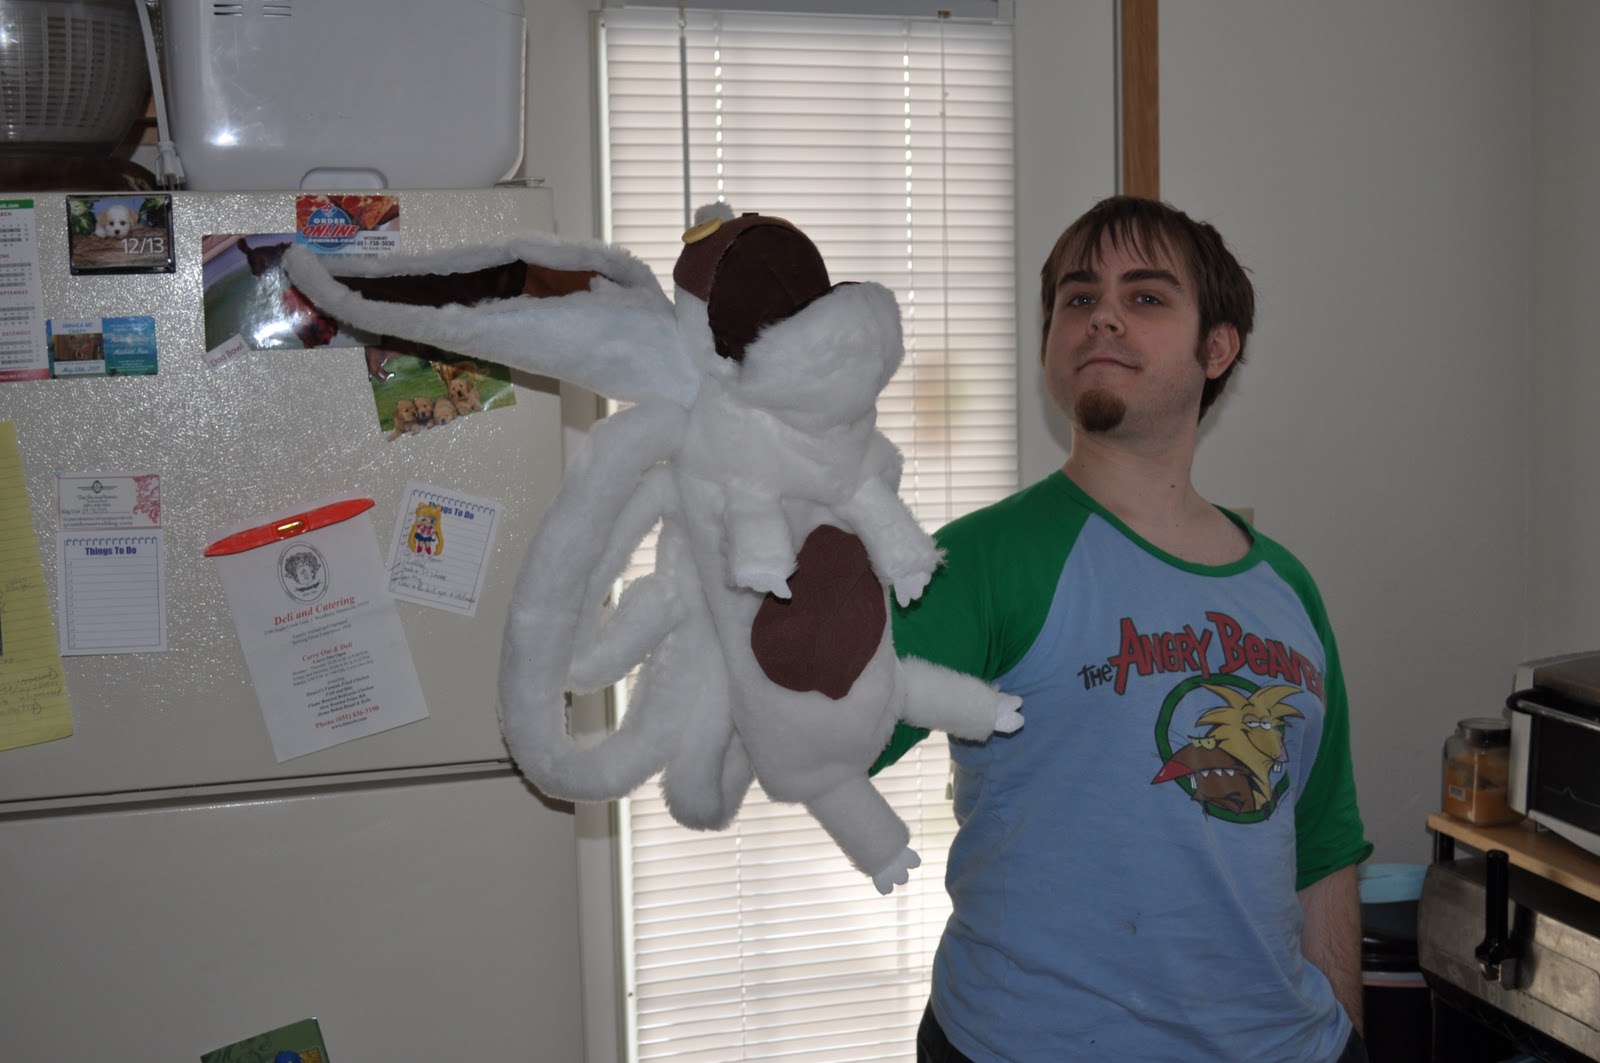


Not bad for being the first puppet I've ever made, no?
~Lumie
I can't believe that this was your first endeavor into puppetry. This is awesome!
ReplyDeleteThank you! It definitely helped that I at least have experience in plush making. :)
ReplyDelete